After using eBird for several years, I’m learning more about some of the features that enhance my reporting. I learned last month that the “comment” section for a given sighting is not viewable by anyone but reviewers and me — but is not the place to make bird-specific comments. Last week, I posted about how to embed a map in a given report – which could really help folks from other areas find a spot where you saw that rare bird.
I’ve noted, in reviewing eBird reports, that some include photos of the bird(s) that they are reporting. I was initially placing links to my Flickr image but just learned a better way. Here’s how the eBird folks describe it:
Guidelines for photo embedding
Although we want the photo embedding to be fun for eBirders and think it is a great way to document your rare finds or share a day’s birding with friends, we do want to make a few recommendations for how best to use this functionality.
1) Although it is possible to paste photos in both your Checklist Comments (i.e., from the Date and Effort page in Step 2 of data entry), we would like to ask that photos of birds be pasted in the species comments for that species. This ensures that they will be useful for documentation for that species.
2) Photos in checklist comments might be of scenery, people and friends, or non-birds seen on your trip. Please use these as you see fit.
3) Please limit your embedded photos to one or two examples per species. We don’t currently have a limit to how many photos can be shown, but remember that when the photos are embedded using code from the photo sharing websites they should link back to that site. We recommend providing representative photos that are helpful fordocumentation; the full suite of photos can be posted to your website.
4) It is very important that the photos you link to be of the actual individuals observedin the field. While it is not necessary that you have photographed the bird in question (i.e., they could be photos taken by a friend), posting photos of some other individual photographed somewhere else could be very confusing for reviewers, and other viewers, who interpret t as documentation of the bird you saw. Please use this feature to post images of the bird you observed.
5) The photos look best using medium dimensions. Most websites will give you an option of what size to display the images. We recommend using medium dimensions (about 400 x 400 pixels, or so).
6) It’s important to realize that you cannot upload photos directly from your home computer to eBird–at least not yet! For now, a third-party photo sharing site must be used, but there are plenty of great free services for that available online, such as Flickr and Picassa.
Linking from Flickr
If you use Flickr (www.flickr.com), a free service for hosting your photos, thendisplaying them in eBird is quite easy:
1. Go to any of your photos uploaded to Flickr and click on the image to get the full view with the full set of options.
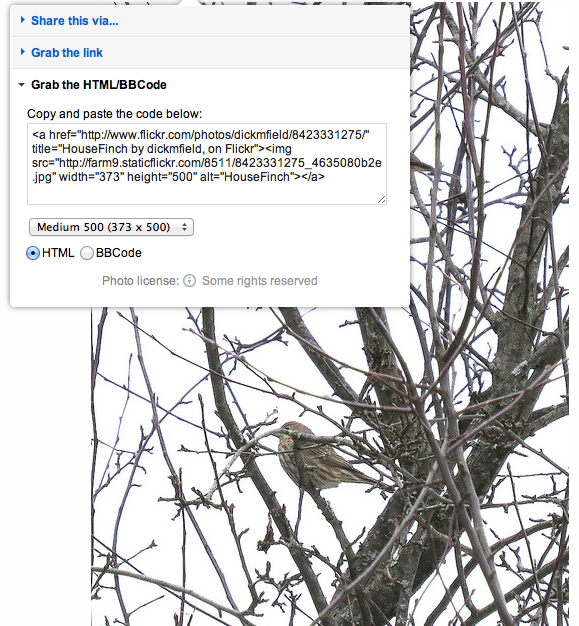
2. Above the photo there are Facebook and Twitter icons and to the right of that is adrop-down menu called “Share”. Click on this and then select “Grab the HTML/BBCode”.
3. Select “Medium” size for the photos and make sure the HTML radio button is selected.
4. Then select the text (one click selects it all), copy, and then paste this string of code into the eBird species comments.
Be sure that the photos are set to “public”. When you save your eBird checklist you should see the photos displayed.
How to embed photos from Flickr. Click the share icon at the top of the photo and you get a drop-down menu. Select the “Grab the HTML/BBCode” option and then click to select that text block. This is what you will paste in your eBird species comments.
Linking from Picasa Web
Picasa Web (www.picasaweb.google.com) is another free service for hosting your photos online. Here’s how:
1. Go to any of your photos uploaded to Picasa and click on them to get the full view with the full set of options.
2. On the right side is a little chain with the words “link to this photo” and an “Embdedimage” box where you can grab the HTML code to embed the photo.
3. Before cutting and pasting this code, be sure to select “Medium” size for the photos.
4. Then select the text (one click selects it all), copy, and paste into eBird species comments.
Be sure that the photos are “public”. The code that comes from Picasa is quite a bit longer and more complex than what Flickr uses, but it works just as well.
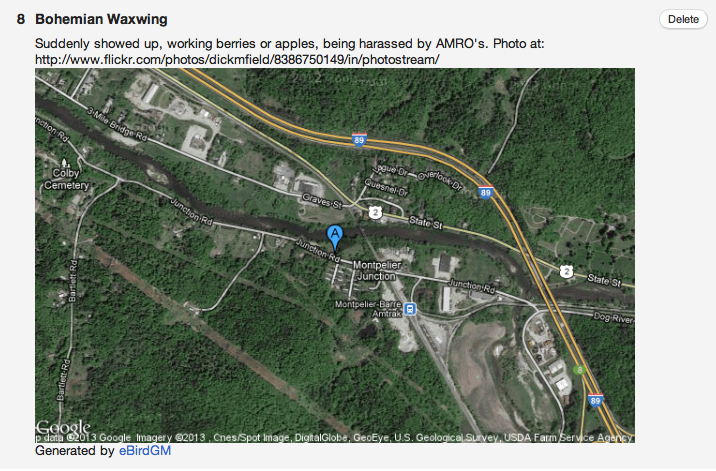
Here’s the report I filed today with two photos:
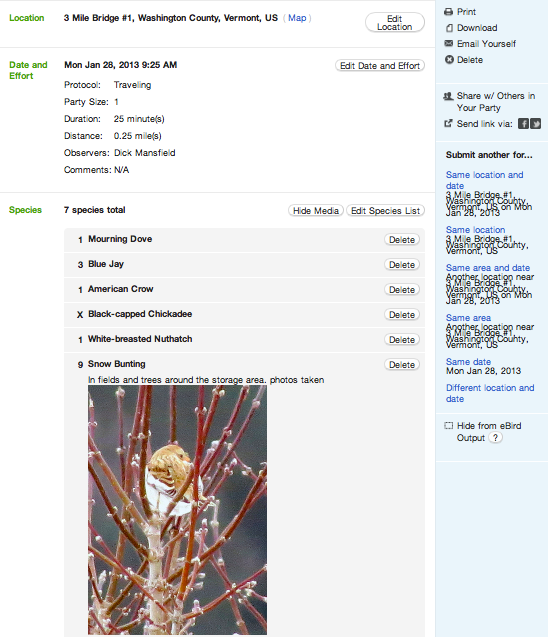
The eBird report I filed this morning.