As I noted last week, I have been looking at options to strengthen our electrical system for those times where we are not hooked up. I decided to install two AGM batteries and a new controller under our couch which would double our capacity and also give us room for further expansion.
So I went down to my friends at Vintage Trailer Supply and talked to them about converters. Steve, the owner, thought that my existing converter would probably work ok but I opted to buy a new INTEL-POWER 9200 which “monitors the battery voltage then automatically adjusts the converter output voltage to provide the proper charging voltage for fast recharge and long-term maintenance.”
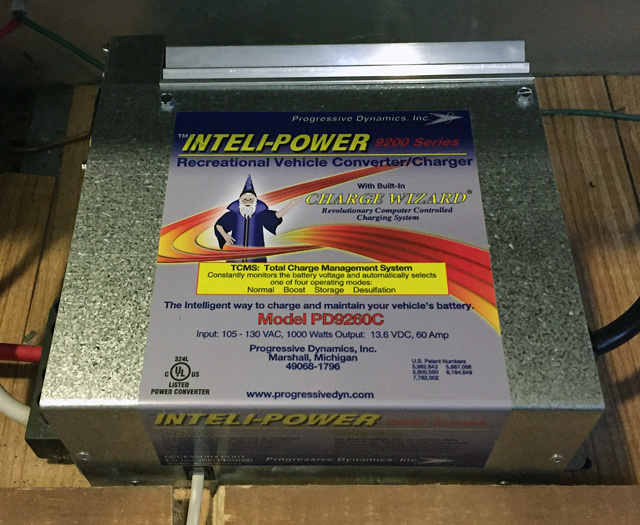
I felt that the expensive AGM batteries needed a state-of-the-art converter.
I had pretty much narrowed my battery choices down to 105 AH units from Fullriver or Lifeline which sell for over $300 per unit. I went with Lifeline because they are American-made and I got a good price from Powerstride Battery who got them here in four days with free shipping.
The installation of the converter was relatively smooth with just two leads to change – but of course it wasn’t that easy – the grounding wire was almost too short because it attaches on the far end of the unit. I got it going and soon was testing it on my existing battery, which it brought up to full charge over a day or so.
The major project while I awaited the new batteries was to move all the wires into the trailer. First, from inside the trailer, I labeled all the wires since some stay as is (the solar lines) and others (the wire for the tongue jack) have to be extended to come inside.
I reluctantly the terminal clamps off (the new units don’t use posts) and used my torch and solder to attach two new leads. Since I did it outside right near the tongue, I disconnected and moved the two propane tanks far away. I pulled all the lines inside, brought my old battery inside, and hooked it up to test the new setup. I got it done on a sunny day just before a front brought an all-day rainstorm.
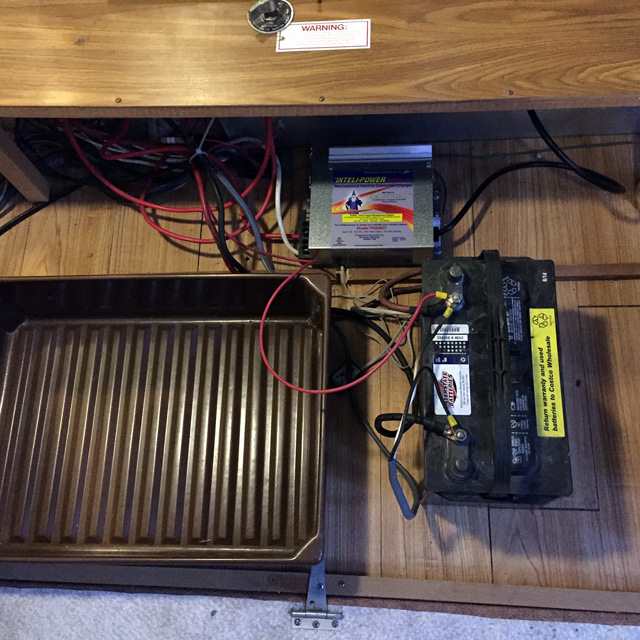
Testing out the new wiring with my old battery. The container will be under the couch – it’s there for spacing. We are sacrificing the middle storage unit for the batteries.
The Lifeline batteries came UPS yesterday afternoon and soon I was moving them into place. They have a 6mm terminal and a positive 8mm one. I knew that but it turned into a hassle as all my positive fittings had holes that were too small. I reamed and drilled out a couple, with some colorful language but I wired them up in parallel and while several leads are too long, the system seems to be in good shape. The converter started polishing off their charge right away.
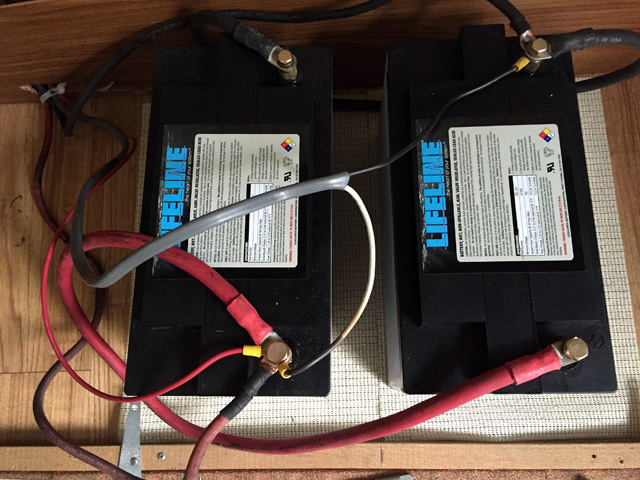
The two Lifelines in parallel with a wiring setup that could use some cleanup – although no one will see it under the couch.
I need to build a containment system around the batteries to keep them from moving. I have the materials and then it’s just moving the couch back, fastening it down, and cleaning it up. I think that this is going to be a good project to give us more flexibility in camping sites – and it is nice to have it done.